


Abstract
Recently, we came across a friend who purchased a portable inkjet marking machine from a supplier. However, he didn’t received a instruction manual and operation videos for him to refer to.
That experience made us realize something important.
Most people know that portable handheld inkjet printers are convenient, but may don’t actually know how to use one correctly, especially the first time.
In this article, we will provide a detailed explanation for you on our Smart I handheld inkjet coding device on how to quickly get started with the operation and easily meet your printing needs.
Step 1: Get to know the handheld inkjet printer and the cartridge
1.1 The handheld Inkjet Printer
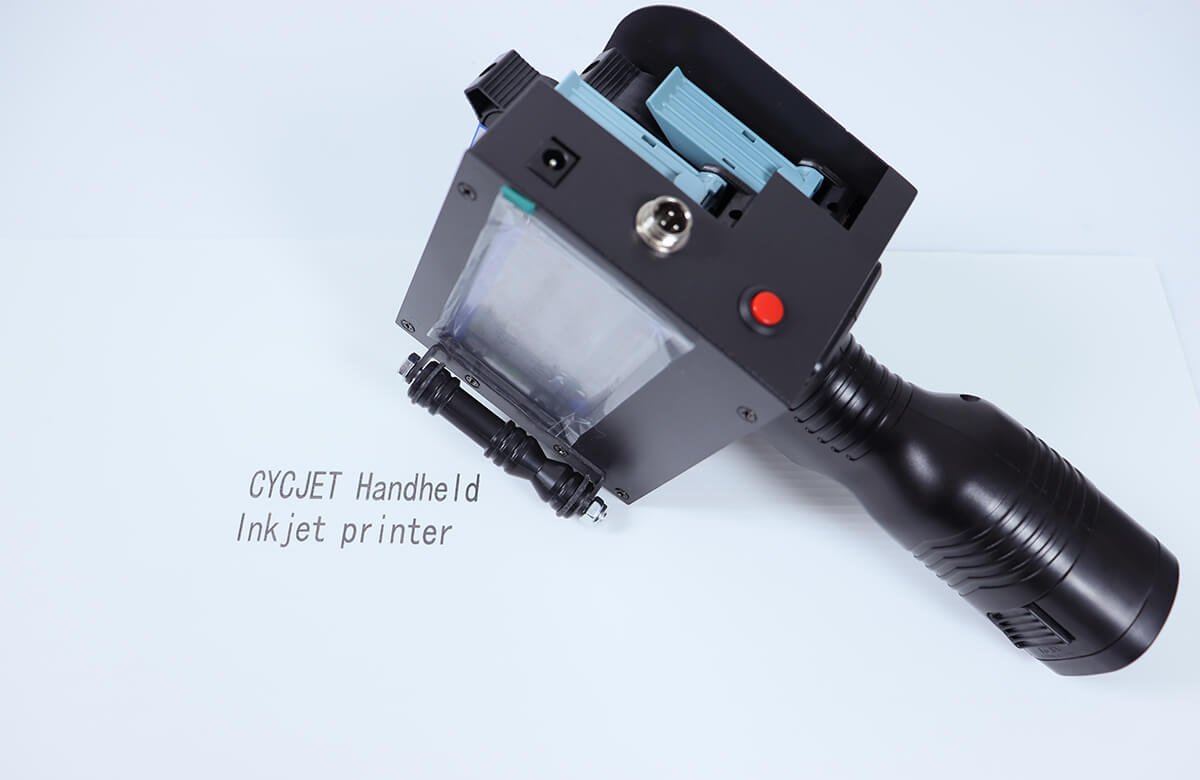
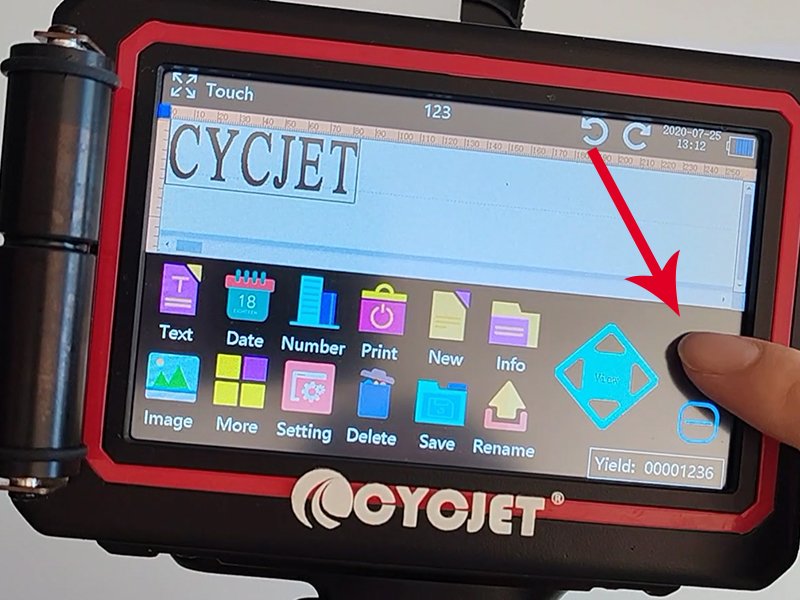
Most portable handheld inkjet printers on the market look quite similar. However, the core function buttons are just a few. Let’s take the Smart I-2L handheld inkjet marking printer as an example.
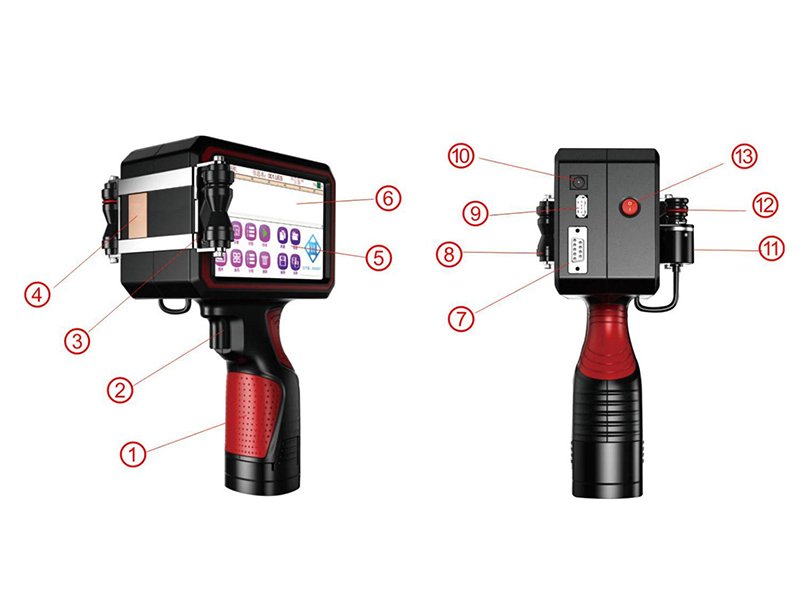
Handheld jet printer Positive
1、The handle (inside the battery)
2、Print switch
3、Auxiliary wheel
4、Nozzle slot
5、Edit unction area
6、Display area
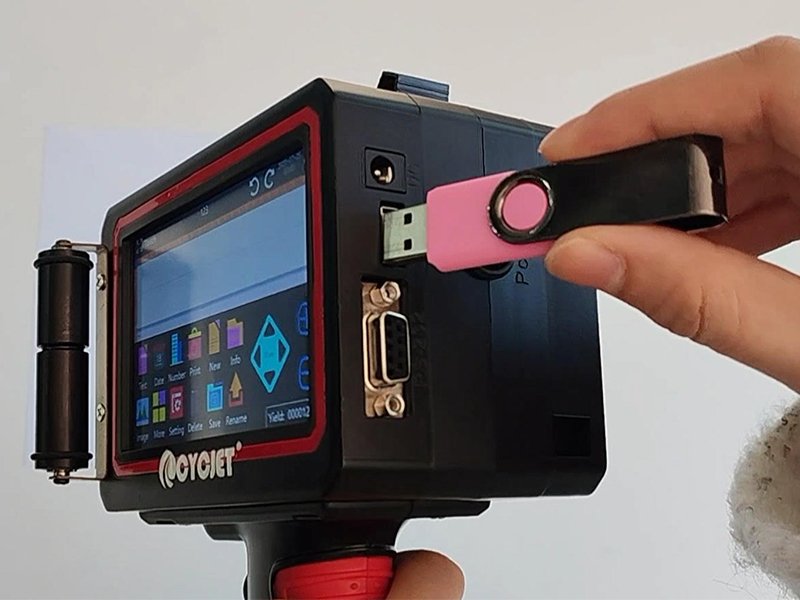
Handheld jet printer other side
7、R232 serial port
8、Auxiliary wheel
9、USB serial port
10、Charging interface(17V)
11、Synchronizer
12、Transmission belt
13、Power switch
2.2 The Ink Cartridge
The ink cartridge is the heart of your handheld inkjet printing machine. Without it, printing is impossible-just like trying to write without ink.
Our typical cartridge looks like this:
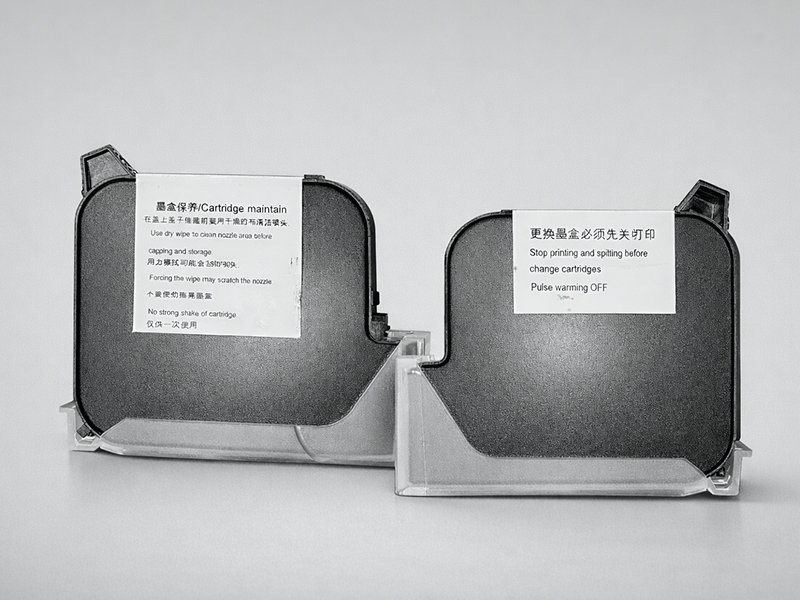
Instruction and maitenance labels on both sides.
A white acrylic protective cover at the bottom to protect the electronic core
! Important tip:
Always power off the portable inkjet printer before installing or removing the cartridge.
If you need a step-by-step cartridge installation video, feel free to contact our sales engineer.
Step 2: Create your label content and adjust printing settings
Once:
The battery is installed and fully charged.
The ink cartridge is properly installed.
You’re ready to print!
The Smart I-2L portable handheld printer is designed for maximum convenience. It meets the needs of most users for printing:
- Dates
- Time
- Logos
- Text
- Batch numbers
- Barcodes
- QR codes
Now, without further ado, let’s look at how to set up your printing content on this handheld inkjet coding printer.
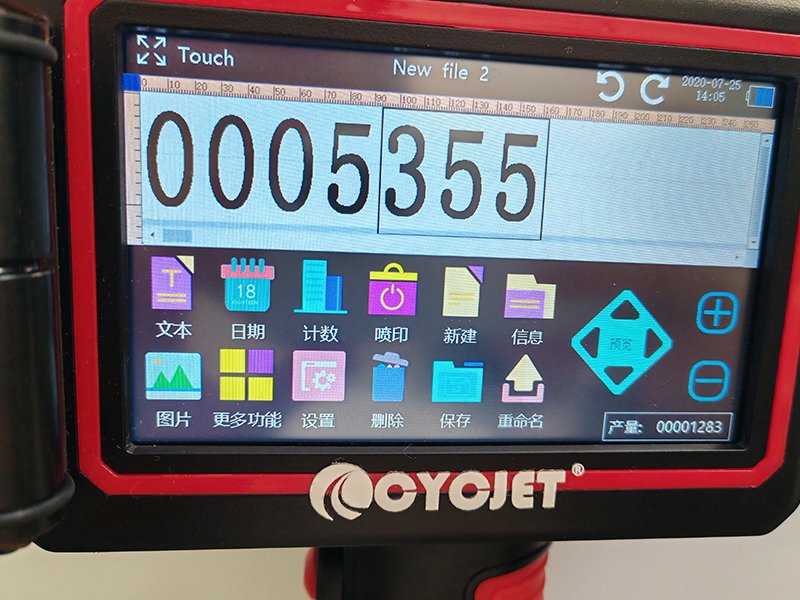
As you can see on the screen, you can add and customize text, date, numbers, and images directly on the handheld inkjet marking device. After setting your content, simply:
- Hold the printer
- Press the print trigger
- Move steadily across the surface.
My advice:
Always do a test print on paper first to make sure everything looks exactly how you want.
How to adjust text or image size?
If the printed content looks too big or too small, don’t worry.
To adjust the overall size, you can simply:
- Use the “+” or “-” buttons on the right side for quick size adjustments.
- Alternatively, you can tap the content to enter the settings interface, where you can fine-tune the height and width.
!Rest assured, our handheld printing system supports 28 languages, including English, French, Spanish, Arabic, and more.
Step3: How to import my Logo via USB?
After inserting the USB flash drive, go to settings and open file management on your handheld inkjet printer.
Locate your USB device, find the logo file you want to use, tap edit, and select copy. This will save your correct logo or image, allowing you to quickly print it directly from the list.
Please refer to the operation flowchart below for detailed steps.

1.Go to settings
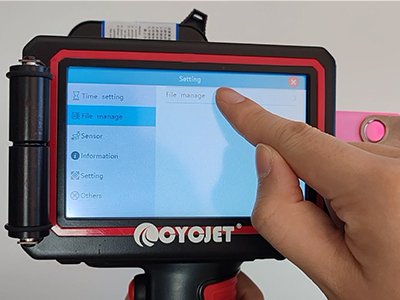
2.Open file management
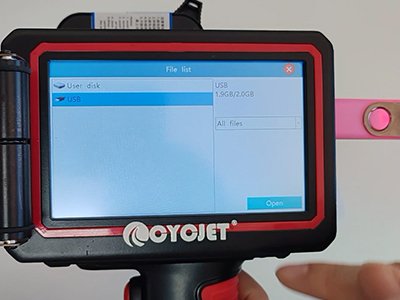
3.Locate your USB
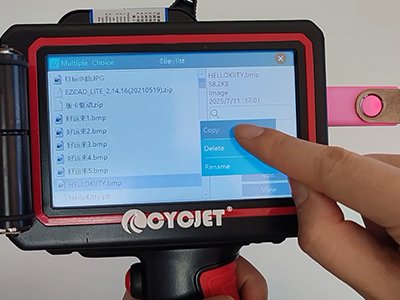
4.Find Logo file
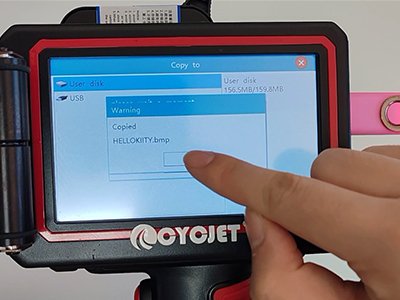
5. Copied your Logos
Step4: Fix Messy or misaligned printing
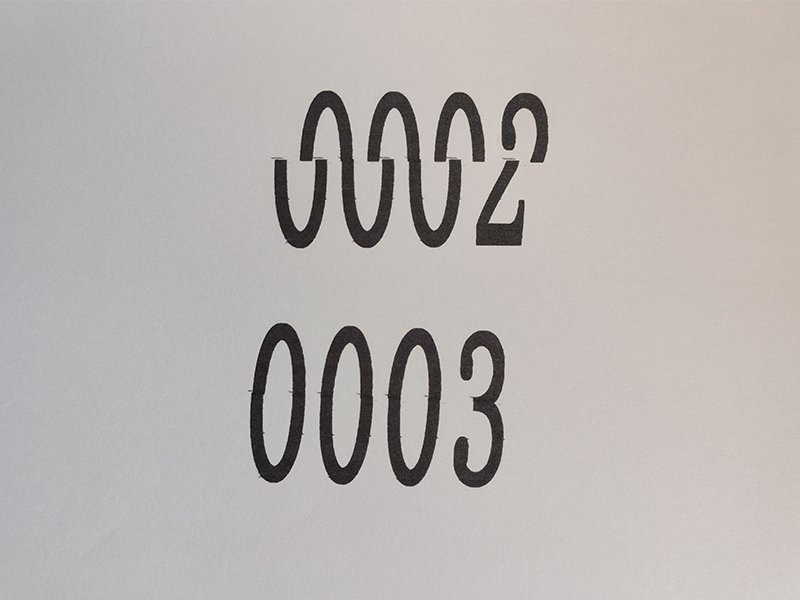
Question:
Why does my printed text look messy or misaligned? Good new—it’s not a machine problem. This issue usually occurs when the settings are not properly adjusted and is more common with dual-head or multi-head handheld inkjet printers.
How to fix it?
- Go to Printing Settings
- Find Printing Spacing
- Adjust the parameter
- Test print on white paper
This step may take a little patience, but once it’s set, the print quality will be clean and consistent.
Step 5: After Printing, Do This One Thing
When the job is done, wipe the nozzle gently with a soft cloth if needed. Always wipe in one direction.
If the printer will not be used again soon, remove the cartridge. This one step prevents most long-term issues.
Handheld printers fail more from poor storage than from heavy use.
Why This Method Works for Product Labeling
Traditional labeling systems require fixed positions, fixed data, and fixed workflows.
A portable handheld inkjet printing solution does the opposite:
- You print where you need
- You change content instantly
- You label mixed products without stopping production
That flexibility is why more factories and warehouses use handheld inkjet marking machines for product labeling instead of pre-printed labels.